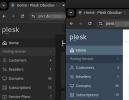
• Halloween is coming! To celebrate the occasion, we dusted off a couple of old skins, and even created a brand new one (Pixel).
    To get into the festive spirit, install the Skins extension.
  • The new Python extension is now available. It allows customers to deploy and manage WSGI-based Python applications on their websites directly from Plesk.
  • The Plesk Mobile apps for iOS and Android and the Plesk Mobile Center extension have been deprecated, and are no longer available for new installations. In Plesk Obsidian 18.0.84, the Plesk Mobile Center extension will be removed from servers during the upgrade, and the Plesk Mobile apps will lose their server management features.
  • The Social Login extension has been deprecated and will be removed in Plesk Obsidian 18.0.84. After that, it will no longer be possible to log in to Plesk with a Google, Facebook, GitHub account, or with a passkey. Plesk usernames and passwords, as well as logging in with a WebPros Account, are not affected.

Resolved Plesk Login for Customers over Subdomain with Certificate.

cpulove

New Pleskian
Hi, I'd like to know, what the best practice would be, to create a custom login for Plesk Customers over their own URL.

So lets the Plesk Sever Login is plesk.hostname.xy:8443 and it is secured via letsencrypt with the certificate for the Plesk Server: plesk.hostname.xy

How can I setup a Plesk Login with certificate with the customers Domainname? >> plesk.domainname.xy:8443

A DNS A or CNAME Record so far brings up the loginpage, but as expected, without proper SSL, as the port shows to the Plesk Servers hostname with the certificate from there >> plesk.hostname.xy.

Any help would be nice!
 
One way to achieve this, at least in Obsidian (did not test it in onyx) is this way:

  1. Add a subdomain under each customer. I will use here plesk.customer.com as example.
  2. Go to plesk.customer.com > Dashboard > PHP
  3. Uncheck the PHP Support option
  4. Press OK
  5. Go to Domains > plesk.customer.com > Hosting & DNS > Apache & nginx Settings.
  6. Uncheck the Proxy mode option.
  7. Press Apply
  8. Add the following lines into Additional nginx directives:
    Code:
    location / {    proxy_set_header X-Forwarded-For $remote_addr;
        proxy_set_header Host $http_host;
        proxy_pass https://127.0.0.1:8443;
    }
  9. Press OK
As you can see here, both will have a valid SSL and open the panel:
1744278837371.png
 
Sorry for my late reply! I integrated it today and indeed, this works flawless.
So thx a lot! Appreciated this...
 
Back
Top