A
Anton Akhtyamov
Guest
Hey there fellow Pleskians! Today we’ve been thinking about enhancing Plesk Multi Server with Centralized DNS support. Why? Because you’ll be able to use a single set of name servers for all the domains you host on Plesk Multi Server service nodes. And even if we’re still developing Centralized DNS further, you can still use our Slave DNS Manager extension to get this feature going in a few simple steps.
The article covers:
This server allows single-Plesk-interface users to run hosting services on multiple servers. This way, you’ll get two or more Plesk instances interconnected via our Extensions SDK. One of these nodes will be a “Management node”, used for managing all other nodes. Meanwhile, all the Plesk instances connected to a Management node are called “Service nodes”. Plesk Multi Server is intended for small and medium-sized shared hosting providers and web design & development studios that also host the clients’ website. Is this you? Then let’s briefly touch upon the infrastructure configuration.
Infrastructure Configuration
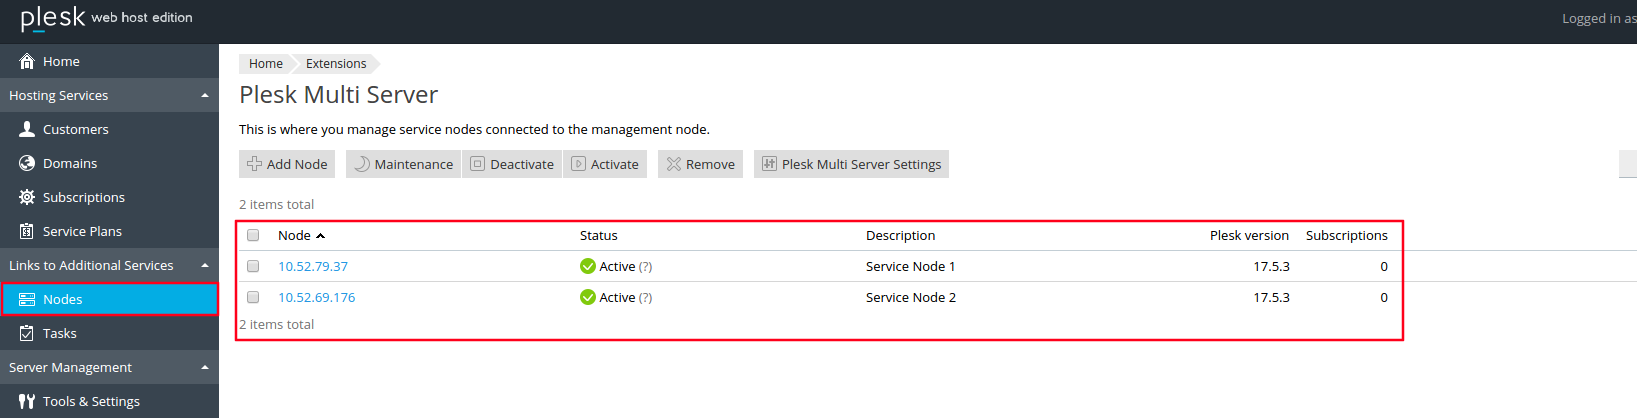
Plesk Multi Server needs one or more service nodes installed. So here we’ll go for a clean installation – two service nodes with no subscriptions or customers. In this setup, each service node will be used as a master DNS server.
First, deploy and configure one or more DNS servers that will be used as Slave DNS. So follow these configuration steps below. In this example, we’ll be using servers with CentOS 7:
Installation and Configuration
You can learn how to install and configure the Slave DNS Manager extension on standalone Plesk servers in our documentation.
How to check if you configured Slave DNS correctly
You can also configure Slave DNS Manager for an existing Plesk Multi Server infrastructure. It’s the same as with a clean installation. So let’s configure Centralized DNS for Plesk Multi Server with two service nodes and 500 subscriptions.
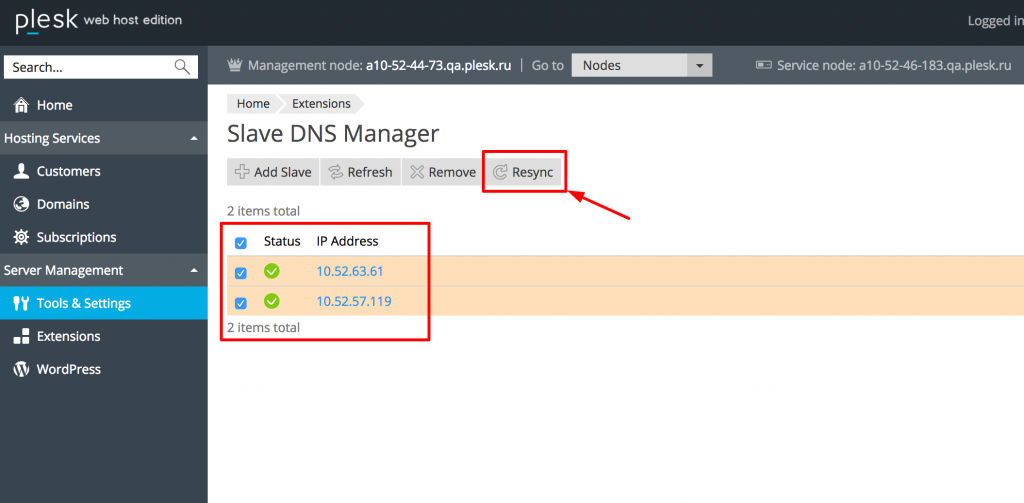
Perform steps 1 through 7, as for a clean installation. After the configuration is complete, click the ‘Resync‘ button so that the DNS zones of all existing domains are transferred to the DNS slave servers.
Check the /var/log/messages log to make sure that all DNS zones have been moved. You will see messages about the successful completion of the transfer, or one of the errors described in the Troubleshooting section. You can find all transferred DNS zones in the /var/named directory:
[root@a10-52-63-61 ~]# cat /var/named/3bf305731dd26307.nzf | wc -l
508
[root@a10-52-57-119 ~]# ls -la /var/named/ | wc -l
519
Troubleshooting: Slave DNS on Plesk Multi Server
Here’s a list of issues you may encounter while configuring the Slave DNS server, and steps to resolve them.
Now you know how to set up centralized Slave DNS on both a clean Plesk Multi Server installation and one that is already in production. Plus, you’ve got pointers for any potential pitfalls you may encounter. It’s time to put this knowledge into practice – Go ahead, give it a try!
Finally, the Slave DNS Manager extension is an open project and you can always contribute by committing to our Github repository. May the force be with you!
The post How to add Centralized Slave DNS to Plesk Multi Server appeared first on Plesk.
Continue reading...
The article covers:
- How to configure Centralized DNS on a new Plesk Multi Server installation
- How to do this process with existing customers and subscriptions
- How to troubleshoot any possible issues
This server allows single-Plesk-interface users to run hosting services on multiple servers. This way, you’ll get two or more Plesk instances interconnected via our Extensions SDK. One of these nodes will be a “Management node”, used for managing all other nodes. Meanwhile, all the Plesk instances connected to a Management node are called “Service nodes”. Plesk Multi Server is intended for small and medium-sized shared hosting providers and web design & development studios that also host the clients’ website. Is this you? Then let’s briefly touch upon the infrastructure configuration.
Infrastructure Configuration
Plesk Multi Server
Plesk Multi Server needs one or more service nodes installed. So here we’ll go for a clean installation – two service nodes with no subscriptions or customers. In this setup, each service node will be used as a master DNS server.
Slave DNS Server
First, deploy and configure one or more DNS servers that will be used as Slave DNS. So follow these configuration steps below. In this example, we’ll be using servers with CentOS 7:
- Either configure SElinux…
# sestatus
SELinux status: enabled
# setsebool -P named_write_master_zones 1
…or disable it completely:
# sed -i 's/SELINUX=enforcing/SELINUX=disabled/g' /etc/sysconfig/selinux
# sed -i 's/SELINUX=enforcing/SELINUX=disabled/g' - Update packages and reboot the OS:
# yum update -y; reboot - Install and configure the BIND service:
- Install it:
yum install -y bind bind-utils - Allow new zones with rndc:
sed -i 's/options {/options {\n allow-new-zones yes;/;' /etc/named.conf - Turn off DNS recursion:
# sed -i 's/recursion\ yes;/recursion\ no;/g' /etc/named.conf - Specify which IP addresses are allowed to query the server. We disabled this option entirely:
# cat /etc/named.conf | grep allow-query
//allow-query { localhost; }; - Add the network interfaces the named daemon will listen on. In this example, all IP addresses are added:
# sed -i 's/127.0.0.1;/any;/g' /etc/named.conf
# systemctl restart named - Insert the group write privilege to /var/named, /var/named/chroot/var/named:
# chmod g+w /var/named/ /var/named/chroot/var/named/
- Install it:
- We recommend you enable firewalld or iptables on the server. And make sure that ports 53 (DNS) and 953 (rndc) are accessible from the outside:
# systemctl start firewalld
# firewall-cmd --permanent --zone=public --add-port=53/tcp
# firewall-cmd --permanent --zone=public --add-port=53/udp
# firewall-cmd --permanent --zone=public --add-port=953/tcp
# firewall-cmd --reload
Installation and Configuration
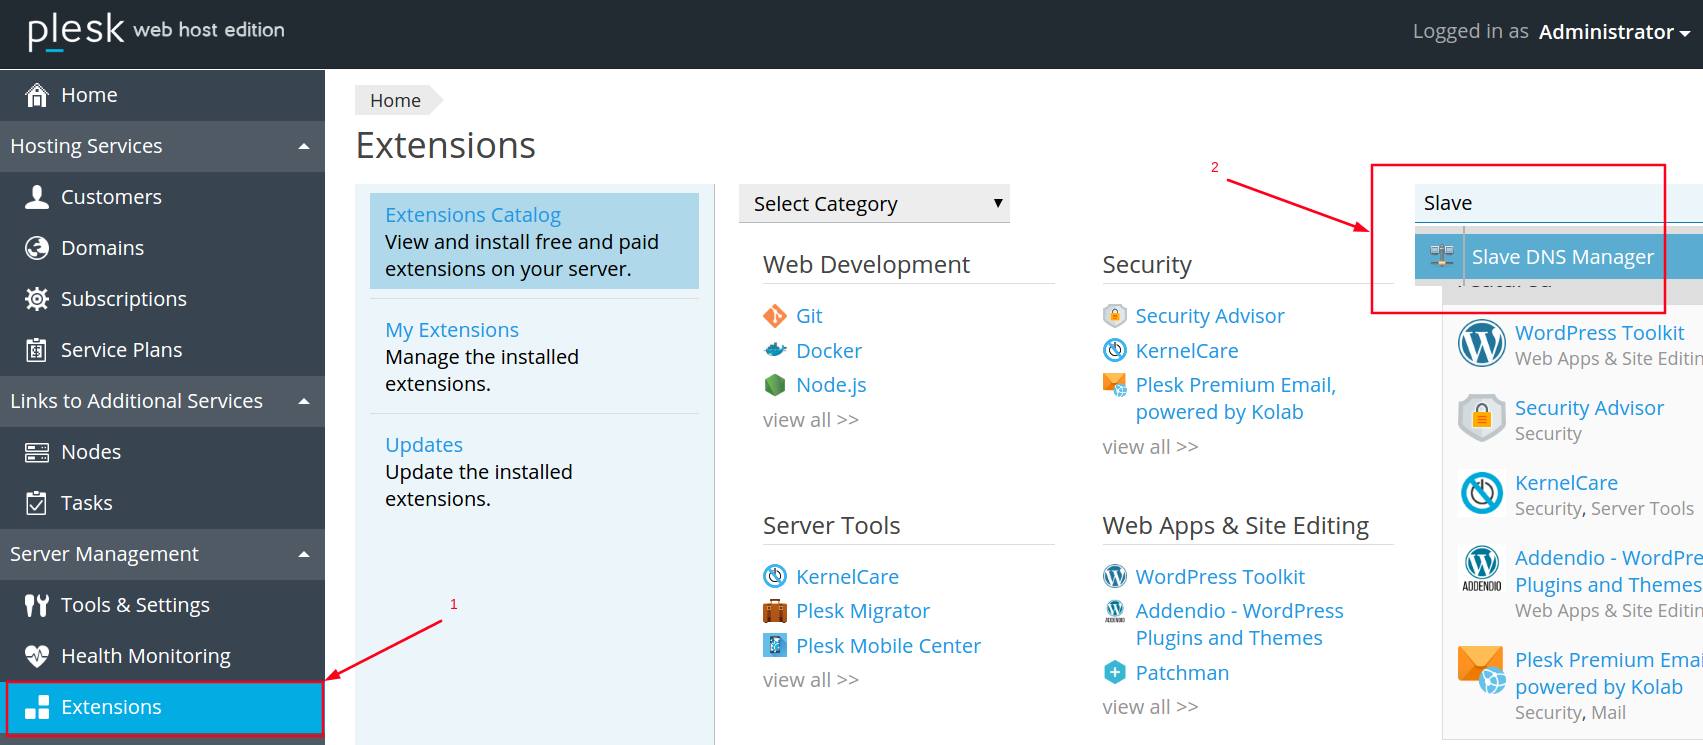
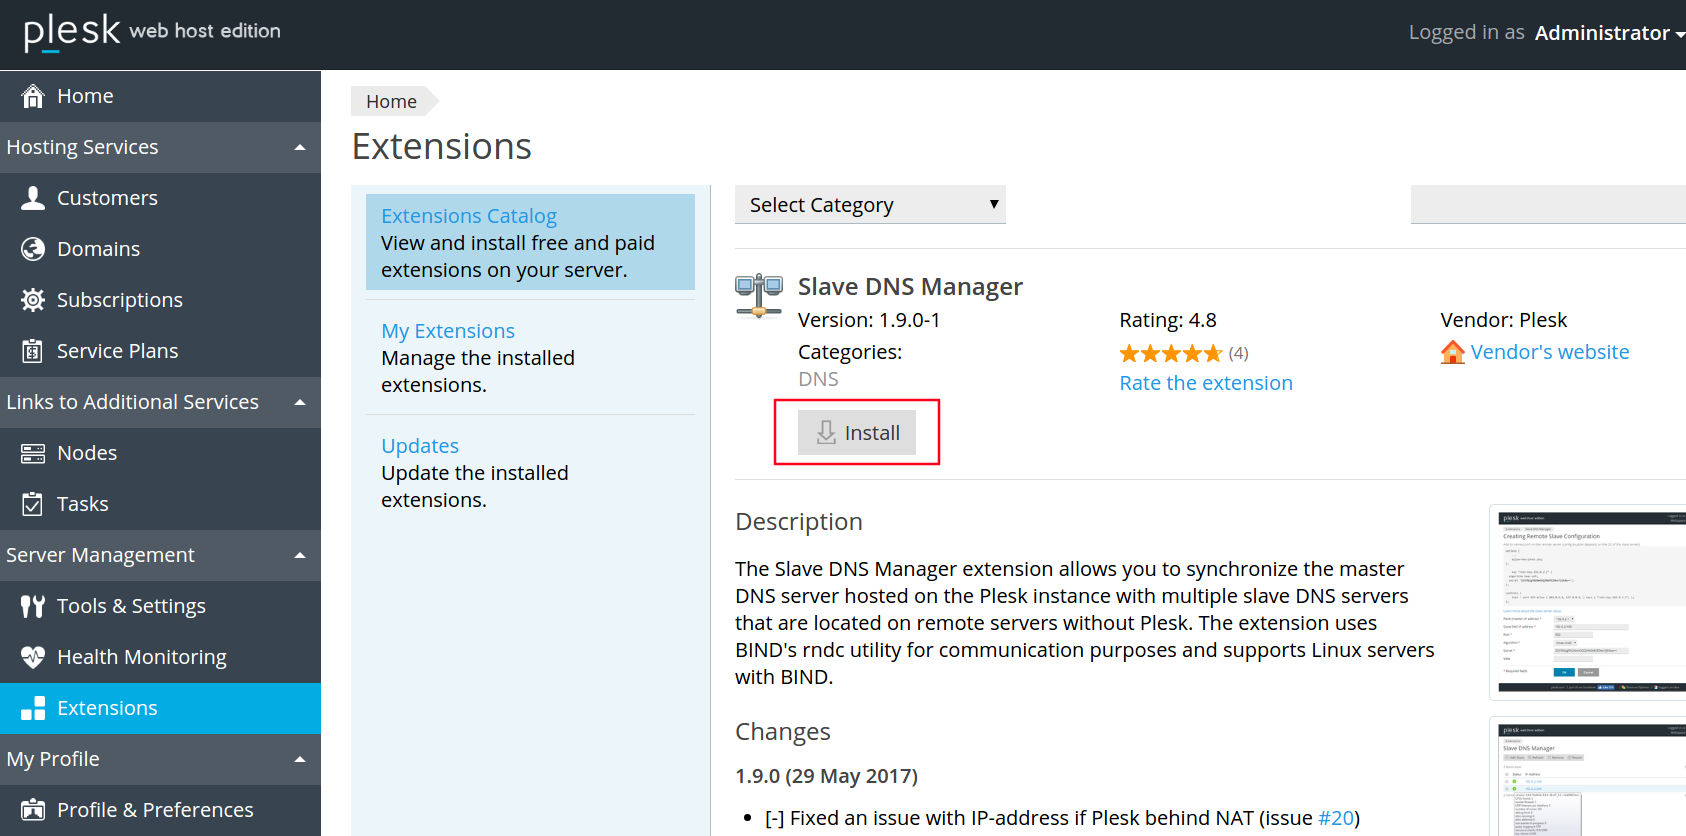
- Go to the Extension Catalog and install the Slave DNS Manager extension. You can learn more about how this extension works in our article here.
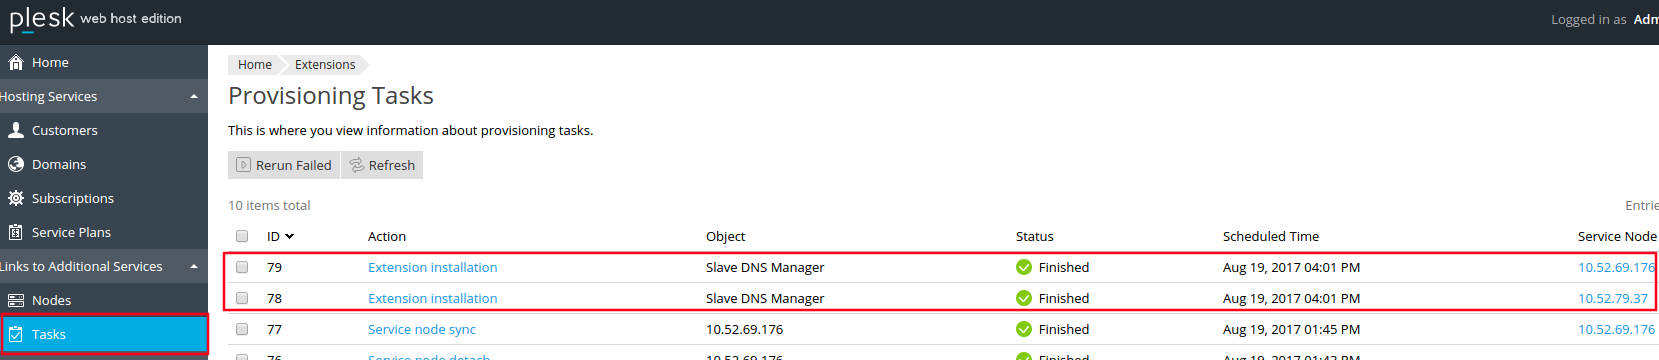
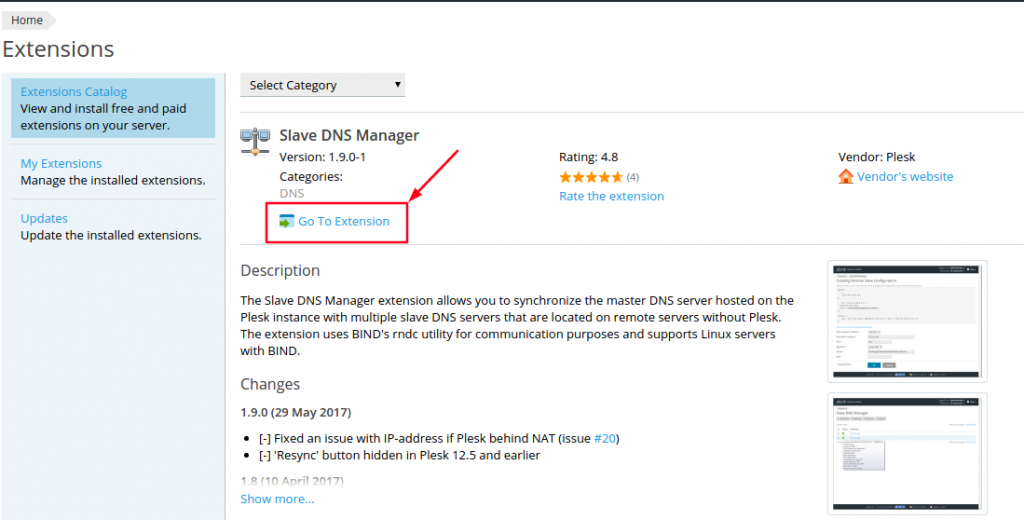
- Use Tasks to make sure that the extension has been properly installed on all service nodes.
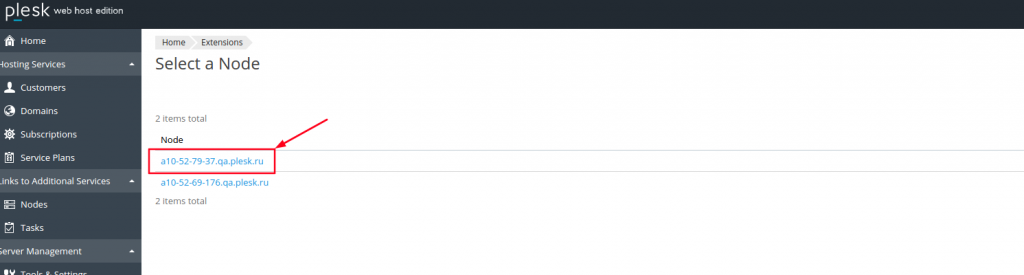
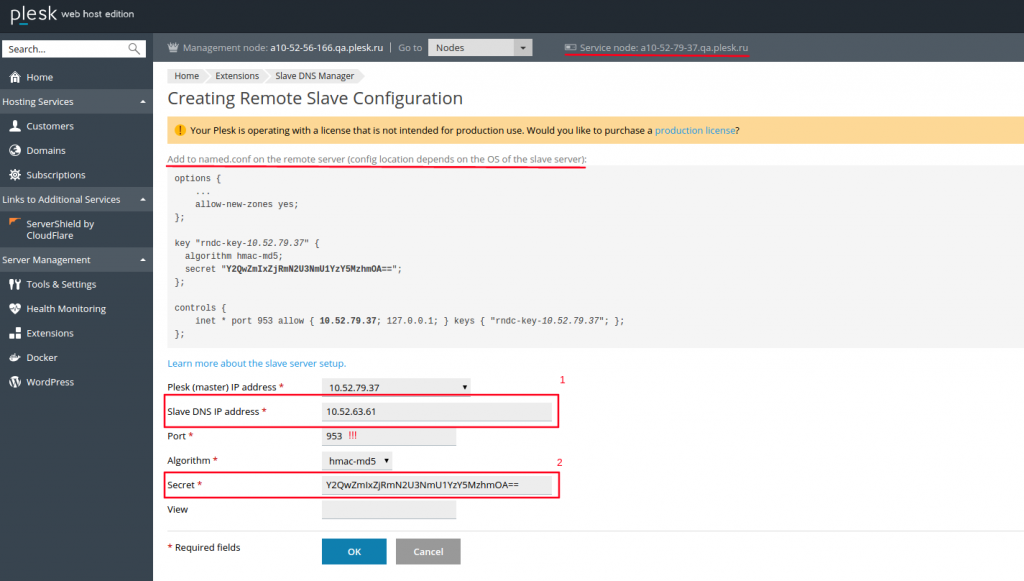
- Add the configured DNS server as a slave DNS to one of the service nodes.
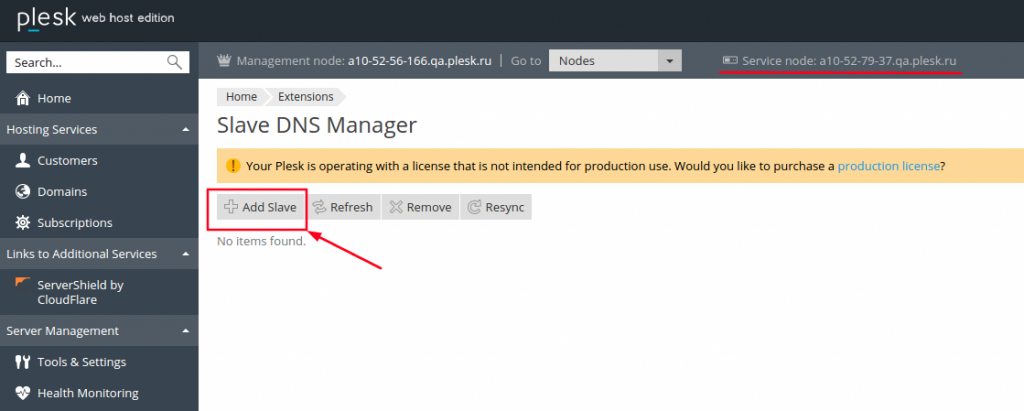
- Enter the IP address of the Slave DNS server and remember the secret key. It will be used by the rndc utility to transfer DNS zones from the master to the slave.
- After saving the configuration, check the status of the connected server. You’ll probably see the following error – but don’t panic!
usr/sbin/rndc -b 10.52.79.37 -s 10.52.63.61 -p 953 -y rndc-key -c /usr/local/psa/var/modules/slave-dns-manager/slave_10.52.63.61.conf status rndc: connection to remote host closed This may indicate that * the remote server is using an older version of the command protocol, * this host is not authorized to connect, * the clocks are not synchronized, or * the key is invalid.
- To fix the issue, add the secret key you saved during step 4 to the named.conf configuration file on the Slave DNS server and restart the DNS server.
# cat /etc/named.conf | grep -A10 rndc key “rndc-key-master” { algorithm hmac-md5; secret “Y2QwZmIxZjRmN2U3NmU1YzY5MzhmOA==”; }; controls { inet * port 953 allow { 10.52.79.37; 127.0.0.1; } keys { “rndc-key-master”; }; };
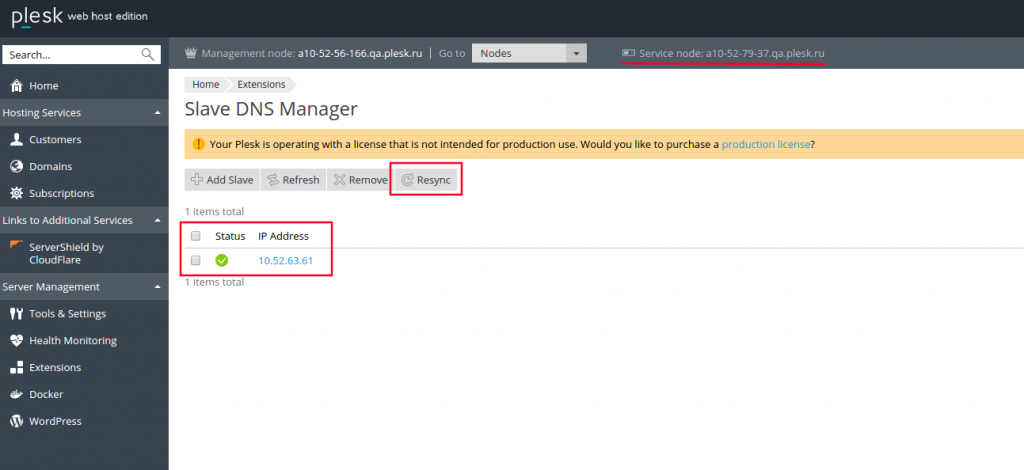
- Click ‘Resync‘ to re-check the communication with the slave DNS server. You should see a green check mark telling you that the settings are correct.
- Add the required number of Slave DNS servers by repeating steps 3-7.
- Configure the Slave DNS servers for all Plesk Multi Server service nodes.
- Don’t forget to add the IP addresses of the service nodes to the controls{…} section of the named.conf configuration file on each Slave DNS server.
You can learn how to install and configure the Slave DNS Manager extension on standalone Plesk servers in our documentation.
How to check if you configured Slave DNS correctly
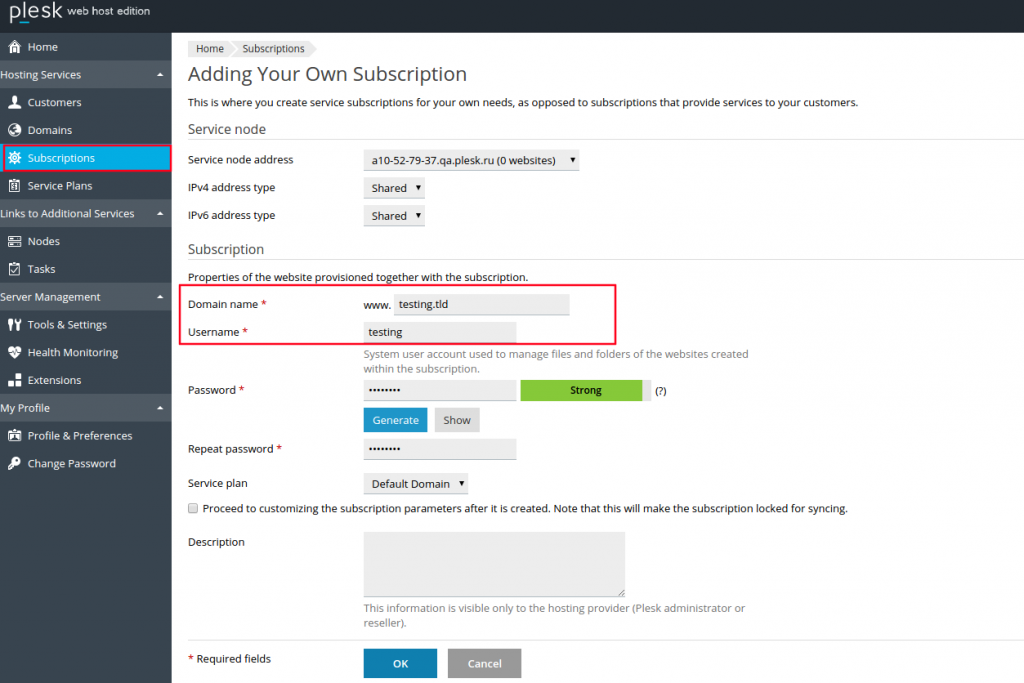
- To check if your Slave DNS is good to go, you should first create a new subscription in Plesk Multi Server. In this example it’s the “testing.tld” domain name.
- Look at the Slave DNS server:
- You will see the following messages in /var/log/messages:
Aug 19 17:34:10 a10-52-63-61 named[21982]: received control channel command 'addzone testing.tld IN { type slave; file "testing.tld"; masters { 10.52.79.37; }; };'
Aug 19 17:34:10 a10-52-63-61 named[21982]: zone testing.tld added to view _default via addzone
Aug 19 17:34:10 a10-52-63-61 named[21982]: zone testing.tld/IN: Transfer started.
Aug 19 17:34:10 a10-52-63-61 named[21982]: transfer of 'testing.tld/IN' from 10.52.79.37#53: connected using 10.52.63.61#36010
Aug 19 17:34:10 a10-52-63-61 named[21982]: zone testing.tld/IN: transferred serial 2017081903
Aug 19 17:34:10 a10-52-63-61 named[21982]: transfer of 'testing.tld/IN' from 10.52.79.37#53: Transfer completed: 1 messages, 20 records, 575 bytes, 0.002 secs (287500 bytes/sec)
Aug 19 17:34:10 a10-52-63-61 named[21982]: zone testing.tld/IN: sending notifies (serial 2017081903)
Aug 19 17:34:10 a10-52-63-61 named[21982]: received control channel command 'refresh testing.tld IN ' - In the mapping file:
# cat /var/named/3bf305731dd26307.nzf | grep testing.tld
zone "testing.tld" { type slave; file "testing.tld"; masters { 10.52.79.37; }; }; - And in the domain DNS zone file:
# ll /var/named/ | grep testing.tld
-rw-r--r-- 1 named named 1031 Aug 19 17:34 testing.tld
- You will see the following messages in /var/log/messages:
- Finally, request the DNS zone of a particular domain from an external server:
# dig testing.tld @10.52.63.61
….
;; ANSWER SECTION:
testing.tld. 86400 IN A 10.52.79.37
…
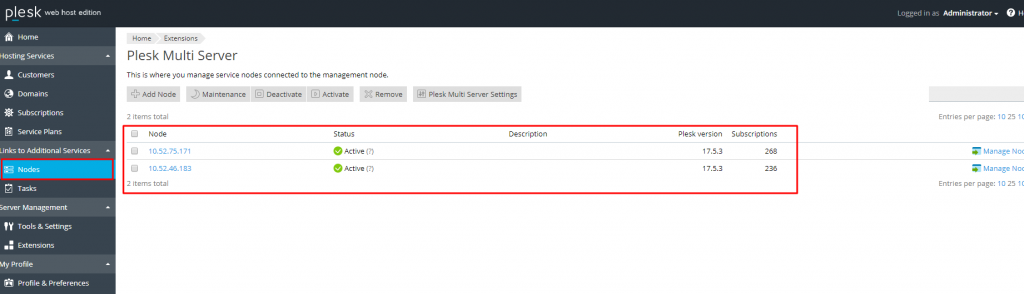
You can also configure Slave DNS Manager for an existing Plesk Multi Server infrastructure. It’s the same as with a clean installation. So let’s configure Centralized DNS for Plesk Multi Server with two service nodes and 500 subscriptions.
Perform steps 1 through 7, as for a clean installation. After the configuration is complete, click the ‘Resync‘ button so that the DNS zones of all existing domains are transferred to the DNS slave servers.
Check the /var/log/messages log to make sure that all DNS zones have been moved. You will see messages about the successful completion of the transfer, or one of the errors described in the Troubleshooting section. You can find all transferred DNS zones in the /var/named directory:
[root@a10-52-63-61 ~]# cat /var/named/3bf305731dd26307.nzf | wc -l
508
[root@a10-52-57-119 ~]# ls -la /var/named/ | wc -l
519
Troubleshooting: Slave DNS on Plesk Multi Server
Here’s a list of issues you may encounter while configuring the Slave DNS server, and steps to resolve them.
- Error: rndc: connect failed: 10.52.47.119#953: host unreachable
Solution: Make sure that the server is up and running. - Error: rndc: connection to remote host closed
Solution:
- See that SElinux has been either disabled or properly configured.
- Make sure that the master rndc key was added to the named.conf file.
- Confirm that the required ports are not blocked by the firewall:
#firewall-cmd --get-default-zone
public
# firewall-cmd --list-port
953/tcp 53/udp 53/tcp - Look at the Slave DNS server configuration section for steps showing how to fix all possible issues.
- Error: rndc: recv failed: connection reset
Solution: Ensure that you specified that control instructions must be accepted from the IP address of the Plesk Multi Server service node. Make sure that you configured BIND to listen on all accessible network interfaces. Check the controls{…} section in /etc/named.conf file on the Slave DNS server.
- Error: In /var/log/messages: named[2296]: open: 3bf305731dd26307.nzf: file not found
Solution: Correct all the permissions on the /var/named directory.
- Error: In /var/log/messages:
named[2003]: invalid command from 10.52.79.37#34535: expired
named[2449]: invalid command from 10.52.75.171#52596: clock skew
chronyd[473]: Forward time jump detected!
Solution: Sync the clocks between servers.
- Error: In /var/log/messages: named[2253]: client 10.50.2.83#54824 (testing2.tld): query ‘testing2.tld/A/IN’ denied
Solution: Make sure that you haven’t allowed queries for localhost only. Check the allow-query{…} section in the /etc/named.conf file.
Now you know how to set up centralized Slave DNS on both a clean Plesk Multi Server installation and one that is already in production. Plus, you’ve got pointers for any potential pitfalls you may encounter. It’s time to put this knowledge into practice – Go ahead, give it a try!
Finally, the Slave DNS Manager extension is an open project and you can always contribute by committing to our Github repository. May the force be with you!
The post How to add Centralized Slave DNS to Plesk Multi Server appeared first on Plesk.
Continue reading...