Also a bug when trying to activate a new firewall configuration:
Internal error: DB query failed: SQLSTATE[23000]: Integrity constraint violation: 1062 Duplicate entry '1-0-5' for key 'configuration_id', query was: insert into module_firewall_rules (configuration_id, direction, priority, object) values ") configuration, :direction, riority, bject)
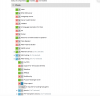
Message
configuration, :direction, riority, bject)
Message DB query failed: SQLSTATE[23000]: Integrity constraint violation: 1062 Duplicate entry '1-0-5' for key 'configuration_id', query was: insert into module_firewall_rules (configuration_id, direction, priority, object) values
configuration, :direction,
riority,
bject)
File Mysql.php
Line 53
Type Plesk\Exception\Database
Here is the preview of what I tried to apply:
#!/bin/bash
#ATTENTION!
#
#DO NOT MODIFY THIS FILE BECAUSE IT WAS GENERATED AUTOMATICALLY,
#SO ALL YOUR CHANGES WILL BE LOST THE NEXT TIME THE FILE IS GENERATED.
set -e
echo 0 > /proc/sys/net/ipv4/ip_forward
([ -f /var/lock/subsys/ipchains ] && /etc/init.d/ipchains stop) >/dev/null 2>&1 || true
(rmmod ipchains) >/dev/null 2>&1 || true
apply_rule()
{
iptables_bin="$1"
shift
iptables_version=`/sbin/iptables --version | awk -F '.' '{print $2$3}'`
# Use the native --wait option since v1.4.20
if [ $iptables_version -gt 420 ]; then
$iptables_bin -w $@ 2>/dev/null
return $?
fi
# Emulate --wait for elderly versions
for i in `seq 10`; do
$iptables_bin $@ 2>&1 | grep -q xtable || return 0
sleep 1
done
return 1
}
/sbin/iptables-save -t filter | grep -- "-A INPUT" | grep -v "fail2ban-\|f2b-" | sed -e "s#^-A#apply_rule /sbin/iptables -D#g" | xargs -0 echo -e "`declare -f apply_rule`\n" | /bin/bash
apply_rule /sbin/iptables -F FORWARD
apply_rule /sbin/iptables -F OUTPUT
apply_rule /sbin/iptables -Z FORWARD
apply_rule /sbin/iptables -Z OUTPUT
apply_rule /sbin/iptables -P INPUT DROP
apply_rule /sbin/iptables -A INPUT -m state --state ESTABLISHED,RELATED -j ACCEPT
apply_rule /sbin/iptables -A INPUT -p tcp ! --syn -m state --state NEW -j REJECT --reject-with tcp-reset
apply_rule /sbin/iptables -A INPUT -m state --state INVALID -j DROP
apply_rule /sbin/iptables -P OUTPUT DROP
apply_rule /sbin/iptables -A OUTPUT -m state --state ESTABLISHED,RELATED -j ACCEPT
apply_rule /sbin/iptables -A OUTPUT -p tcp ! --syn -m state --state NEW -j REJECT --reject-with tcp-reset
apply_rule /sbin/iptables -A OUTPUT -m state --state INVALID -j DROP
apply_rule /sbin/iptables -P FORWARD DROP
apply_rule /sbin/iptables -A FORWARD -m state --state ESTABLISHED,RELATED -j ACCEPT
apply_rule /sbin/iptables -A FORWARD -p tcp ! --syn -m state --state NEW -j REJECT --reject-with tcp-reset
apply_rule /sbin/iptables -A FORWARD -m state --state INVALID -j DROP
apply_rule /sbin/iptables -A INPUT -i lo -j ACCEPT
apply_rule /sbin/iptables -A OUTPUT -o lo -j ACCEPT
apply_rule /sbin/iptables -A FORWARD -i lo -o lo -j ACCEPT
apply_rule /sbin/iptables -t mangle -F
apply_rule /sbin/iptables -t mangle -Z
apply_rule /sbin/iptables -t mangle -P PREROUTING ACCEPT
apply_rule /sbin/iptables -t mangle -P OUTPUT ACCEPT
apply_rule /sbin/iptables -t mangle -P INPUT ACCEPT
apply_rule /sbin/iptables -t mangle -P FORWARD ACCEPT
apply_rule /sbin/iptables -t mangle -P POSTROUTING ACCEPT
/sbin/ip6tables-save -t filter | grep -- "-A INPUT" | grep -v "fail2ban-\|f2b-" | sed -e "s#^-A#apply_rule /sbin/ip6tables -D#g" | xargs -0 echo -e "`declare -f apply_rule`\n" | /bin/bash
apply_rule /sbin/ip6tables -F FORWARD
apply_rule /sbin/ip6tables -F OUTPUT
apply_rule /sbin/ip6tables -Z FORWARD
apply_rule /sbin/ip6tables -Z OUTPUT
apply_rule /sbin/ip6tables -P INPUT DROP
apply_rule /sbin/ip6tables -A INPUT -m state --state ESTABLISHED,RELATED -j ACCEPT
apply_rule /sbin/ip6tables -A INPUT -p tcp ! --syn -m state --state NEW -j REJECT --reject-with tcp-reset
apply_rule /sbin/ip6tables -A INPUT -m state --state INVALID -j DROP
apply_rule /sbin/ip6tables -P OUTPUT DROP
apply_rule /sbin/ip6tables -A OUTPUT -m state --state ESTABLISHED,RELATED -j ACCEPT
apply_rule /sbin/ip6tables -A OUTPUT -p tcp ! --syn -m state --state NEW -j REJECT --reject-with tcp-reset
apply_rule /sbin/ip6tables -A OUTPUT -m state --state INVALID -j DROP
apply_rule /sbin/ip6tables -P FORWARD DROP
apply_rule /sbin/ip6tables -A FORWARD -m state --state ESTABLISHED,RELATED -j ACCEPT
apply_rule /sbin/ip6tables -A FORWARD -p tcp ! --syn -m state --state NEW -j REJECT --reject-with tcp-reset
apply_rule /sbin/ip6tables -A FORWARD -m state --state INVALID -j DROP
apply_rule /sbin/ip6tables -A INPUT -i lo -j ACCEPT
apply_rule /sbin/ip6tables -A OUTPUT -o lo -j ACCEPT
apply_rule /sbin/ip6tables -A FORWARD -i lo -o lo -j ACCEPT
apply_rule /sbin/ip6tables -t mangle -F
apply_rule /sbin/ip6tables -t mangle -Z
apply_rule /sbin/ip6tables -t mangle -P PREROUTING ACCEPT
apply_rule /sbin/ip6tables -t mangle -P OUTPUT ACCEPT
apply_rule /sbin/ip6tables -t mangle -P INPUT ACCEPT
apply_rule /sbin/ip6tables -t mangle -P FORWARD ACCEPT
apply_rule /sbin/ip6tables -t mangle -P POSTROUTING ACCEPT
apply_rule /sbin/iptables -t nat -F
apply_rule /sbin/iptables -t nat -Z
apply_rule /sbin/iptables -t nat -P PREROUTING ACCEPT
apply_rule /sbin/iptables -t nat -P OUTPUT ACCEPT
apply_rule /sbin/iptables -t nat -P POSTROUTING ACCEPT
apply_rule /sbin/iptables -A INPUT -p tcp --dport 12443 -j ACCEPT
apply_rule /sbin/ip6tables -A INPUT -p tcp --dport 12443 -j ACCEPT
apply_rule /sbin/iptables -A INPUT -p tcp --dport 11443 -j ACCEPT
apply_rule /sbin/iptables -A INPUT -p tcp --dport 11444 -j ACCEPT
apply_rule /sbin/ip6tables -A INPUT -p tcp --dport 11443 -j ACCEPT
apply_rule /sbin/ip6tables -A INPUT -p tcp --dport 11444 -j ACCEPT
apply_rule /sbin/iptables -A INPUT -p tcp --dport 8447 -j ACCEPT
apply_rule /sbin/ip6tables -A INPUT -p tcp --dport 8447 -j ACCEPT
apply_rule /sbin/iptables -A INPUT -p tcp --dport 8443 -j ACCEPT
apply_rule /sbin/iptables -A INPUT -p tcp --dport 8880 -j ACCEPT
apply_rule /sbin/ip6tables -A INPUT -p tcp --dport 8443 -j ACCEPT
apply_rule /sbin/ip6tables -A INPUT -p tcp --dport 8880 -j ACCEPT
apply_rule /sbin/iptables -A INPUT -p tcp --dport 80 -j ACCEPT
apply_rule /sbin/iptables -A INPUT -p tcp --dport 443 -j ACCEPT
apply_rule /sbin/ip6tables -A INPUT -p tcp --dport 80 -j ACCEPT
apply_rule /sbin/ip6tables -A INPUT -p tcp --dport 443 -j ACCEPT
apply_rule /sbin/iptables -A INPUT -p tcp --dport 21 -j ACCEPT
apply_rule /sbin/ip6tables -A INPUT -p tcp --dport 21 -j ACCEPT
apply_rule /sbin/iptables -A INPUT -p tcp --dport 22 -j ACCEPT
apply_rule /sbin/ip6tables -A INPUT -p tcp --dport 22 -j ACCEPT
apply_rule /sbin/iptables -A INPUT -p tcp --dport 587 -j DROP
apply_rule /sbin/ip6tables -A INPUT -p tcp --dport 587 -j DROP
apply_rule /sbin/iptables -A INPUT -p tcp --dport 25 -j DROP
apply_rule /sbin/iptables -A INPUT -p tcp --dport 465 -j DROP
apply_rule /sbin/ip6tables -A INPUT -p tcp --dport 25 -j DROP
apply_rule /sbin/ip6tables -A INPUT -p tcp --dport 465 -j DROP
apply_rule /sbin/iptables -A INPUT -p tcp --dport 110 -j DROP
apply_rule /sbin/iptables -A INPUT -p tcp --dport 995 -j DROP
apply_rule /sbin/ip6tables -A INPUT -p tcp --dport 110 -j DROP
apply_rule /sbin/ip6tables -A INPUT -p tcp --dport 995 -j DROP
apply_rule /sbin/iptables -A INPUT -p tcp --dport 143 -j DROP
apply_rule /sbin/iptables -A INPUT -p tcp --dport 993 -j DROP
apply_rule /sbin/ip6tables -A INPUT -p tcp --dport 143 -j DROP
apply_rule /sbin/ip6tables -A INPUT -p tcp --dport 993 -j DROP
apply_rule /sbin/iptables -A INPUT -p tcp --dport 106 -j DROP
apply_rule /sbin/ip6tables -A INPUT -p tcp --dport 106 -j DROP
apply_rule /sbin/iptables -A INPUT -p tcp --dport 3306 -j DROP
apply_rule /sbin/ip6tables -A INPUT -p tcp --dport 3306 -j DROP
apply_rule /sbin/iptables -A INPUT -p tcp --dport 5432 -j DROP
apply_rule /sbin/ip6tables -A INPUT -p tcp --dport 5432 -j DROP
apply_rule /sbin/iptables -A INPUT -p tcp --dport 9008 -j DROP
apply_rule /sbin/iptables -A INPUT -p tcp --dport 9080 -j DROP
apply_rule /sbin/ip6tables -A INPUT -p tcp --dport 9008 -j DROP
apply_rule /sbin/ip6tables -A INPUT -p tcp --dport 9080 -j DROP
apply_rule /sbin/iptables -A INPUT -p udp --dport 137 -j DROP
apply_rule /sbin/iptables -A INPUT -p udp --dport 138 -j DROP
apply_rule /sbin/iptables -A INPUT -p tcp --dport 139 -j DROP
apply_rule /sbin/iptables -A INPUT -p tcp --dport 445 -j DROP
apply_rule /sbin/ip6tables -A INPUT -p udp --dport 137 -j DROP
apply_rule /sbin/ip6tables -A INPUT -p udp --dport 138 -j DROP
apply_rule /sbin/ip6tables -A INPUT -p tcp --dport 139 -j DROP
apply_rule /sbin/ip6tables -A INPUT -p tcp --dport 445 -j DROP
apply_rule /sbin/iptables -A INPUT -p udp --dport 1194 -j DROP
apply_rule /sbin/ip6tables -A INPUT -p udp --dport 1194 -j DROP
apply_rule /sbin/iptables -A INPUT -p udp --dport 53 -j DROP
apply_rule /sbin/iptables -A INPUT -p tcp --dport 53 -j DROP
apply_rule /sbin/ip6tables -A INPUT -p udp --dport 53 -j DROP
apply_rule /sbin/ip6tables -A INPUT -p tcp --dport 53 -j DROP
apply_rule /sbin/ip6tables -A INPUT -p icmpv6 --icmpv6-type 134/0 -j ACCEPT
apply_rule /sbin/ip6tables -A INPUT -p icmpv6 --icmpv6-type 135/0 -j ACCEPT
apply_rule /sbin/ip6tables -A INPUT -p icmpv6 --icmpv6-type 136/0 -j ACCEPT
apply_rule /sbin/ip6tables -A INPUT -p icmpv6 --icmpv6-type 137/0 -j ACCEPT
apply_rule /sbin/iptables -A INPUT -p icmp --icmp-type 8/0 -j ACCEPT
apply_rule /sbin/ip6tables -A INPUT -p icmpv6 --icmpv6-type 128/0 -j ACCEPT
apply_rule /sbin/ip6tables -A INPUT -p icmpv6 --icmpv6-type 129/0 -j ACCEPT
apply_rule /sbin/iptables -A INPUT -j DROP
apply_rule /sbin/ip6tables -A INPUT -j DROP
apply_rule /sbin/iptables -A OUTPUT -j ACCEPT
apply_rule /sbin/ip6tables -A OUTPUT -j ACCEPT
apply_rule /sbin/iptables -A FORWARD -j DROP
apply_rule /sbin/ip6tables -A FORWARD -j DROP
echo 1 > /proc/sys/net/ipv4/ip_forward
#
# End of script
#